
New tile sits on whatever is left after the old floor comes up. This work covers taking up the old tile, clearing thinset or mastic, looking at what is underneath, and fixing anything that would get in the way of the new installation.
We decide the order after seeing the existing finish and whatever part of the base we can reach. Some floors need only spot repairs. Others need wider patching, flattening or a new underlayment before tile can go down.
What’s included
| Item | What we do | Notes |
|---|---|---|
| Site check | We look at the tile type, grout joints, edges, access and the finishes next to the work area. | Cabinets, door casings and built-in appliances can limit access. |
| Dust control | We plan barriers, protected paths and covers before breaking any tile. | Dust is reduced, not eliminated. |
| Removal | We take up tile and scrape, chip or grind off thinset, mastic or adhesive. | The method depends on what the tile was bonded to. |
| Base correction | We patch, flatten or pour self-leveling underlayment as the substrate needs. | The surface is checked again before new tile is set. |
Materials we work with
| Material | Use on a prepared floor | Notes |
|---|---|---|
| Primer | Prepares the substrate for patch or leveler | Used where the next product calls for it. |
| Patching compound | Fills chips, low spots and isolated defects | For local repairs, not broad leveling. |
| Self-leveling underlayment | Corrects wider unevenness | Needs prep, primer, edge control and a thickness within product limits. |
| Cement backer board | Tile base over a suitable subfloor | Has to suit the subfloor below and the tile above. |
| Uncoupling or crack-isolation membrane | Between substrate and tile | Used only where the substrate and tile system allow it. |
| Waterproofing layer | Wet areas | Must be compatible with the layers above and below it. |
Taking up the old tile
Old tile can be bonded to concrete, a wood subfloor, a cement underlayment or an earlier tile layer, and each comes up differently. We remove tile and setting material in sections and look at the floor as it opens up. Loose pieces, cracks and the perimeter show how the old floor was built.
Door casings, cabinets, pipes, floor registers and fixed appliances are handled one at a time. They limit access and decide how the new tile edge will finish.
Dust
Breaking tile and grinding mortar makes fine dust. Before we start, we plan barriers to the adjoining rooms, protected paths for tools and materials, and covers for nearby surfaces. Collection equipment and steady cleanup cut down how far the dust travels, but no method stops all of it.
Tell us beforehand about access needs, pets, belongings that need protecting and any rooms that will be in use, so the setup fits the house.
Thinset, mastic and adhesive
Floors are usually set in thinset mortar. Some walls and floors have mastic or another adhesive instead. Ridges, hard lumps of mortar, weak patches and adhesive film can spoil the bond, the flatness or the final height of the new tile. How much has to come off depends on the surface below and the products used for the new tile.
We scrape, chip or grind until the base is sound and will take the next layer. If the floor is still uneven after that, we patch or flatten it. Tile mortar is not used to fill wide dips.
Checking the substrate
With the old floor gone, we check for movement, flatness, cracks, damaged sections, moisture, contamination and changes in height. Concrete, plywood, OSB, cement board and old underlayments each need different prep. We can only report what we can see or reach during the work.
Setting tile straight over a cracked slab, a wood floor that moves or a deteriorated underlayment does not fix it. Where moisture or the structure is in question, further testing may be needed before the new tile is planned.
Flattening and self-leveling underlayment
A floor can slope toward a drain on purpose, but it still has to meet the flatness the tile and setting method call for. We take down high spots, patch low areas and chipped concrete, or pour a self-leveling underlayment where the unevenness covers a wider area.
Self-leveling underlayment needs a prepared surface, primer, edge control and a thickness within the product’s limits, and it will not fix a subfloor that moves. It also has to work with any membrane, mortar or floor heating that goes on top.
Transitions and floor height
The new floor has to meet doorways, stairs, cabinets and the flooring in the next room. Existing height, underlayment thickness, tile thickness and the edge profile together decide how it meets them, so we work this out during prep, before the field tile goes in.
Walls may be out of square, openings may be off center, and a wood, carpet or resilient floor next door may sit higher or lower. Trims, reducers and thresholds are chosen for each meeting point, with room left for movement joints at the perimeter.
Before the new tile goes down
Right before setting, we check the base again for high spots, weak material, debris and unsupported edges, and recheck layout lines, drains and transition points. Keep other trades, stored materials and anything that could spill off the prepared floor. If later work changes the floor, it gets checked again before tile is set.
What changes the scope
The number of old layers, how hard the old mortar or adhesive holds, access, the subfloor type, damage, the dust setup, the amount of leveling and the transitions all change the job. Some of that only shows once part of the floor is open. An estimate that lists removal, substrate repair, leveling and installation separately is easier to compare than one line for “prep.”
Related projects
Related tile work in Chicago-area homes.
| Photo | Project | Room | Tile and pattern | Town |
|---|---|---|---|---|
| White veined-tile bathroom with corner tub and shower | Bathroom | White veined tile; mosaic floor | Chicago area |
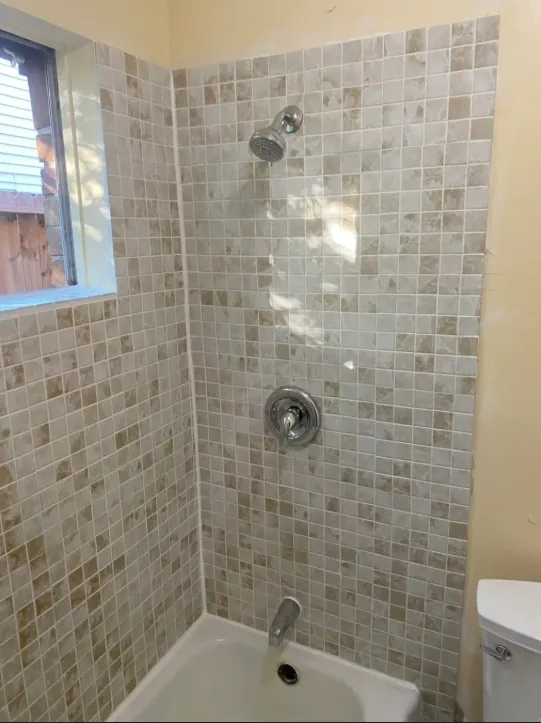 | Small square-tile bathtub surround | Bathroom | Small beige and gray square tile | Chicago area |
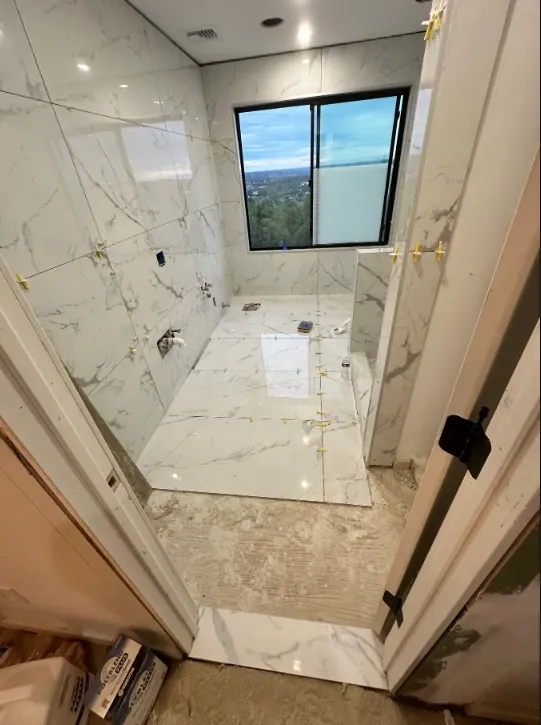 | Windowed bathroom renovation stages | Bathroom | Beige tile to white veined tile | Chicago area |
 | White veined-tile hallway floor with star medallion | Hallway | White veined tile; star medallion | Chicago area |
 | White marble-look bathroom tile installation | Bathroom | White marble-look tile; hex niche | Chicago area |
Areas we serve
Questions we get
Does every existing tile floor need to be removed before new tile is installed?
Not always. It depends on the old floor’s condition, height, stability and compatibility with the new tile system. A look at the exposed base, or as much of it as can be reached, settles it.
How is dust managed during tile removal?
With barriers, protected paths, collection equipment and cleanup suited to the room and the removal method. That cuts the dust down. It does not get rid of all of it.
Can old thinset stay on the floor?
Some can, if it is sound, works with the next product and does not affect flatness or bond. Raised, weak or incompatible residue comes off.
What is self-leveling underlayment used for?
Making a floor flatter over a wide area, where the substrate and tile system allow it. It needs proper surface prep and is chosen for the existing base and the planned tile.
Can damaged subflooring be repaired for tile?
Some damaged areas can be repaired or replaced. The method depends on the kind and extent of the damage, and the repaired base has to suit the underlayment and tile.
What should be considered before floor preparation begins?
Access, fixed fixtures, finishes nearby, belongings, pets, ventilation and which rooms will be in use. We plan the work area around those.
Tell us about the room
Share the surface, the room and what you are considering.
(872) 217-9211[email protected]